How to set up localization with react-i18next
• 4 min read
Introduction
One of the features requested for a personal app of mine was to add multiple languages! Namely German and Spanish. So I decided to go ahead and learn react-i18next.
Here is a short description from the team at react-i18next on what it’s for:
react-18next is a powerful internationalization framework for React / React Native which is based on i18next
With that short introduction out of the way let’s go ahead and get into the setup!
Disclaimer: This is for a react web app!
Setting it up
First, let’s install the necessary packages:
npm install react-i18next i18next
With the packages created let’s create (I am using Typescript btw) the configuration file at the root, let’s name it i18n.ts.
Within the file we’ll go ahead and import the necessary modules from the packages we just installed:
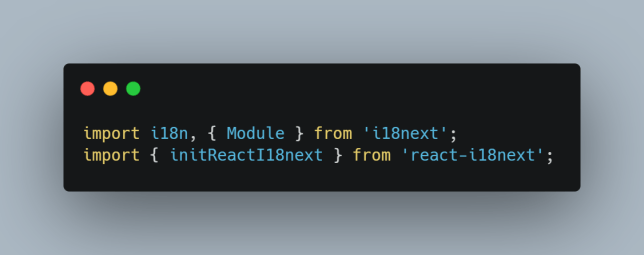
A few lines below that we’ll begin the configuration.
Configuration
The i18next framework expects the resources for the different localizations. This is done with a key:value pairing of the translation and the actual text. Ideally, this would be split up into different locales, so for example in my app for German, Spanish, and English the resource object would look like this:
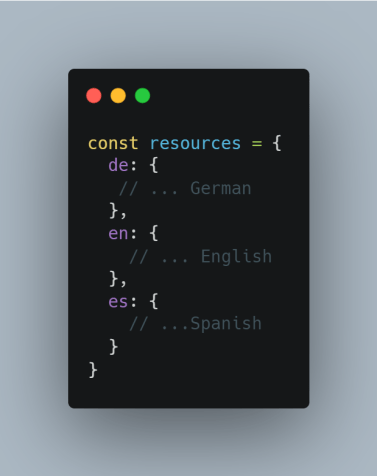
To populate the resources I personally prefer to create a folder with the name locale and start putting in my translations in the folder:
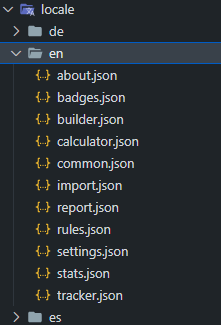
Then I import them into the configuration file and set the values inside the resource object:
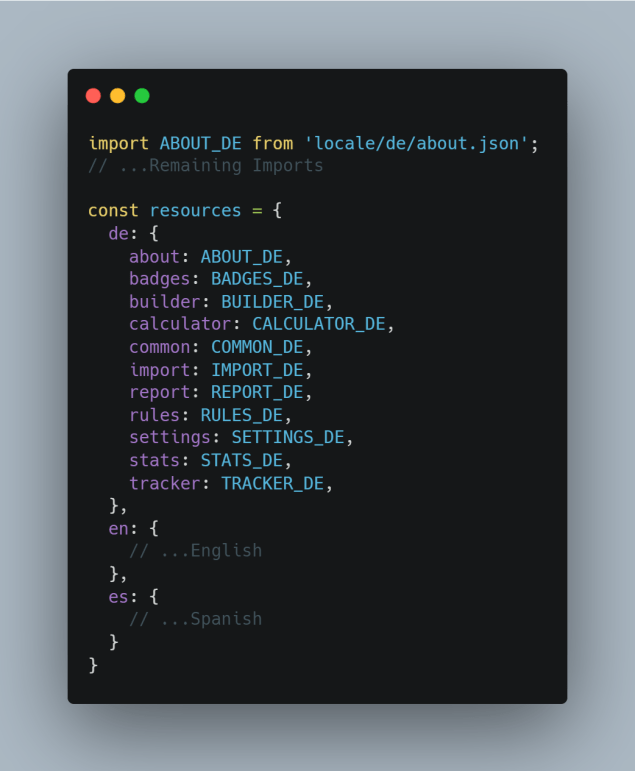
A small example of a resource file (in JSON):
JSON{
	"about": "Über"
}
Afterward, we’ll build out the languageDetector, this part of the configuration will detect what language to display on the launch of the app:
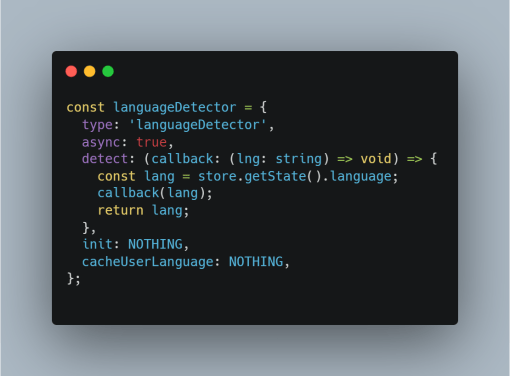
Let’s break this down: The languageDetector object expects several properties. First, the type which indicates that it is a languageDetector. Afterward, we'll label it as an async process. The real meat and bones of this are the detect property, in my case, I have a Zustand store to obtain the language, important to use the callback function of the detect property to set it correctly.
This would take in the language code which corresponds directly to the resources we configured earlier. In my case, I don’t need the init functions or the cacheUserLanguage properties so I just leave them set to an empty function for Typescript purposes.
IMPORTANT : If you don’t have the language for the user stored in some other location and just want the one directly from the browser there is a package just for this!
Bash/Shellnpm install i18next-browser-languagedetector
This will detect the language in the browser. Once installed you can import it from the package:
JavaScriptimport LanguageDetector from 'i18next-browser-languagedetector';
The final step is to create the i18n instance and export it!
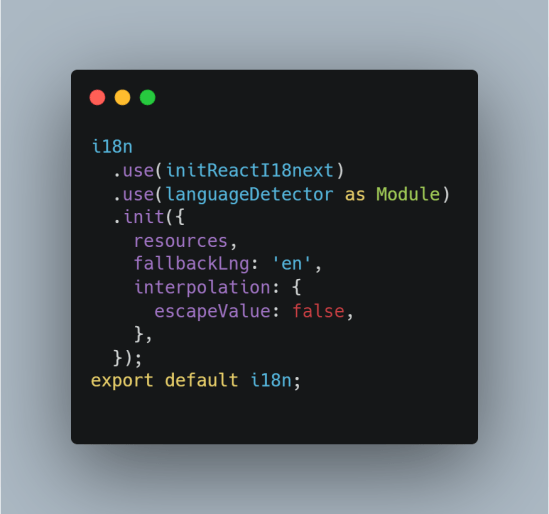
Essentially, we just plug in all the properties we have previously configured. In the init function we set up a fallbackLng in case our languageDetector fails.
Final steps
In our root file where we initial render our React tree let’s go ahead and import our configuration file:
JavaScriptimport './i18n';
Now, you can go ahead and start calling the localization keys using the namespace and key with a hook provided by react-i18next:
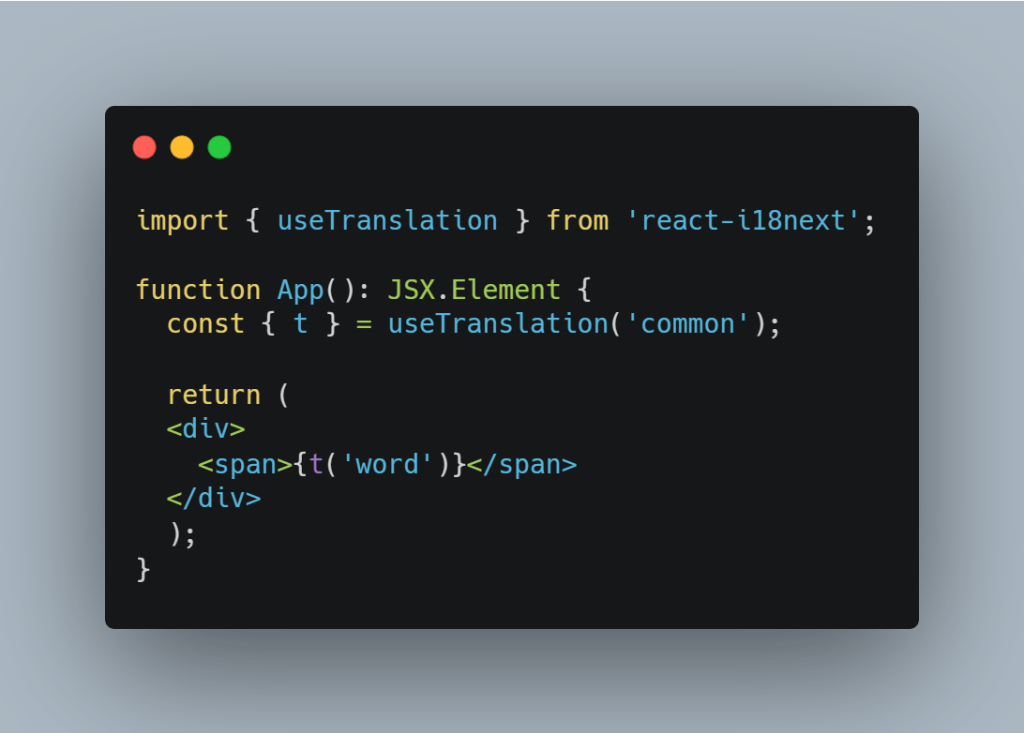
common in this case is the sub-property of the resource object we set earlier to split up our localizations! Neat! and then I just call the key from the JSON file and it’ll display the correct translation.
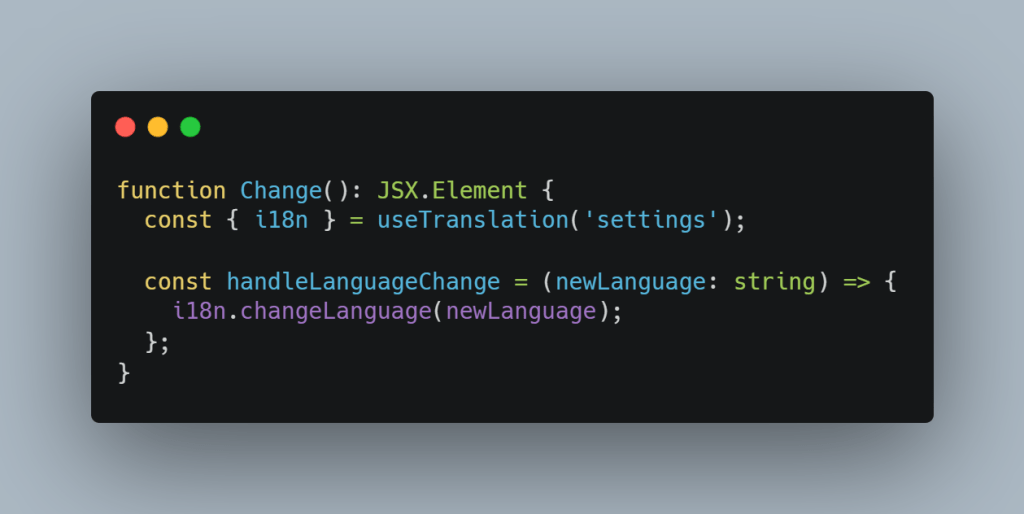
SIDENOTE : You can go ahead and set the language dynamically with another property inside the returned value of the useTranslation hook:
If you see any typos or errors you can edit the article directly on GitHub
Hi, I'm Diego Ballesteros 👋.
Stay on top of the tech industry and grow as a developerwith a curated selection of articles and news alongside personal advice, observations, and insight. 🚀
No spam 🙅♂️. Unsubscribe whenever.
You may also like these articles:
- 2023-06-05T00:41:29.681Z
- 2022-10-25T11:29:26.663Z
- 2022-10-17T14:44:10.229Z
- 2022-10-10T14:02:10.349Z